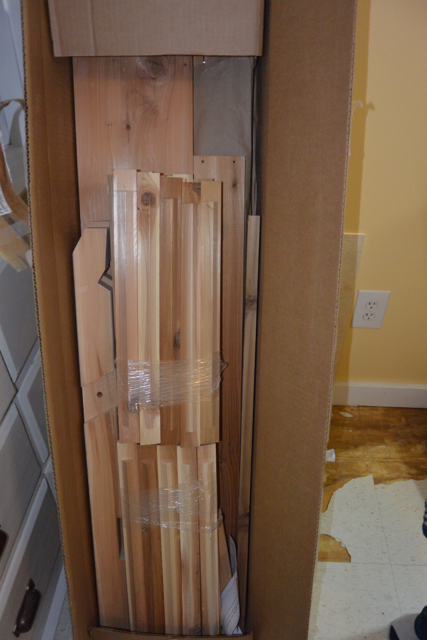
The top bar hive arrived from Bee Thinking. I could not wait to build it, but the box sat in the kitchen for a few weeks until I found the time. I did open the box before I was ready to start. I was greeted by a very lovely smell of cedar! All of the wood parts of the hive are made from cedar. This was very important to me when I was choosing the hive. Yes, cedar smells really good but it is also a good quality wood for outside. I will be oiling the hive with pure tung oil to help preserve it's beauty.
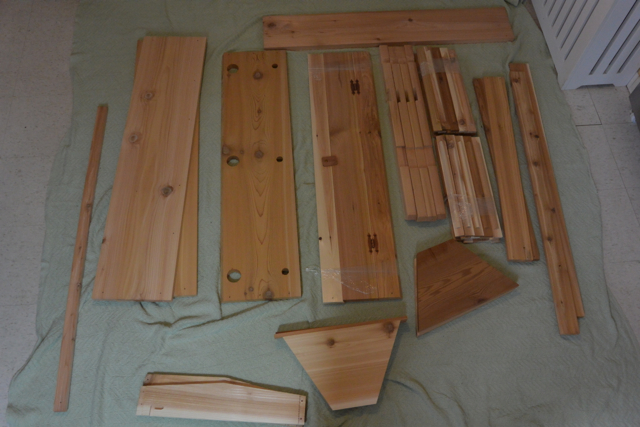
On Sunday, I finally decided it was time to build the hive. On Bee Thinking's website it states that building time will be around 30 minutes. I took out all of the pieces and put them on the floor. I covered the floor with a blanket, as I am known for scratching the floors with my projects (my compost tumbler left a big mark on the dining room floor). Once all of the pieces were out of the box, I started to figure out which piece was what. The parts are very obvious, so this was an easy task.
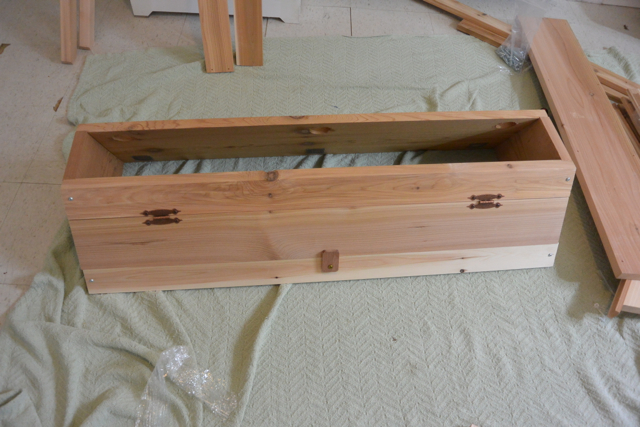
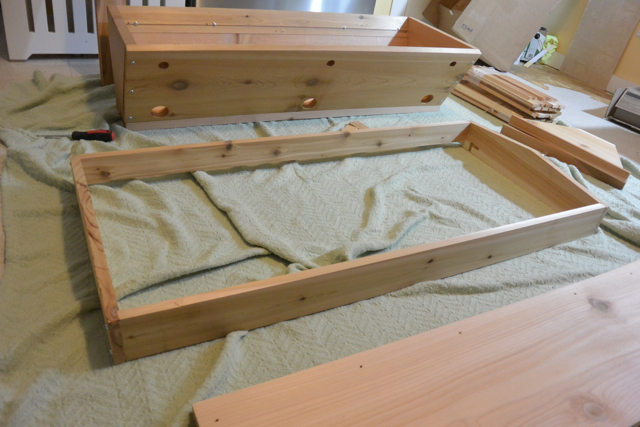
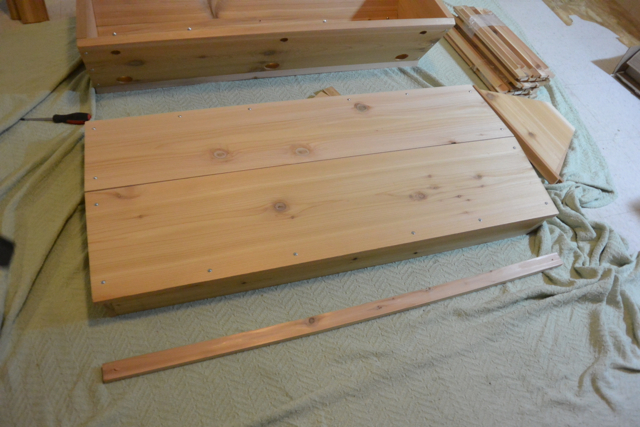
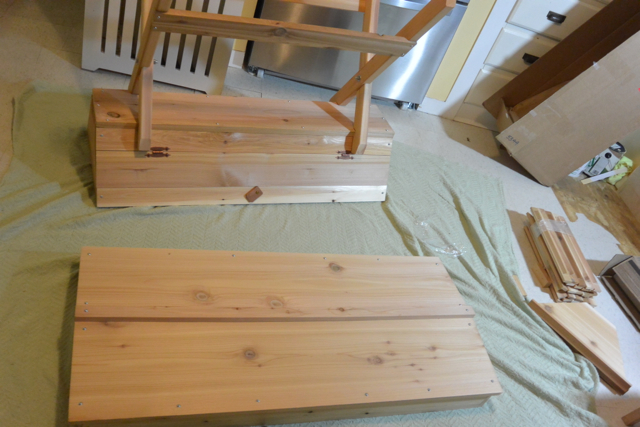
The stand was the first thing that got put together. It was a total of six pieces of wood and everything fit together very well. The stand only took a couple of minutes to put together. Then it was time to build the hive box. The body of the hive is five pieces, unless you unwrap the side panel with the viewing window then it's six pieces. I am sure that it is easier to put the viewing side panel on if you leave the plastic wrap on it! Since I had taken it apart, some adjustments had to be made in the end to make sure the boards and the viewing window all fit well. After the body was built, it was time to put the roof together. The roof has nine pieces to it.
For the most part putting the hive together was pretty easy. I did realize about half through the process that the instructions were missing. I called Bee Thinking customer service, they took care of it right away and emailed the instructions to me. Once the body and lid were built, I realized that it did not fit onto the stand. Once again I called Bee Thinking's customer service and they helped solve the problem. It was a very easy fix, I just needed to loosen the nuts and adjust the stand while putting the body of the hive into it. Once the adjustment was made it fit perfectly.
I did call Bee Thinking again just to ask about two small holes that were on the top of the lid. They were not pre-drilled holes that went all the way through, so it did not make sense to put screws into them. My question was answered, the holes are very small and do not serve any purpose. They do not compromise the design of the hive at all.
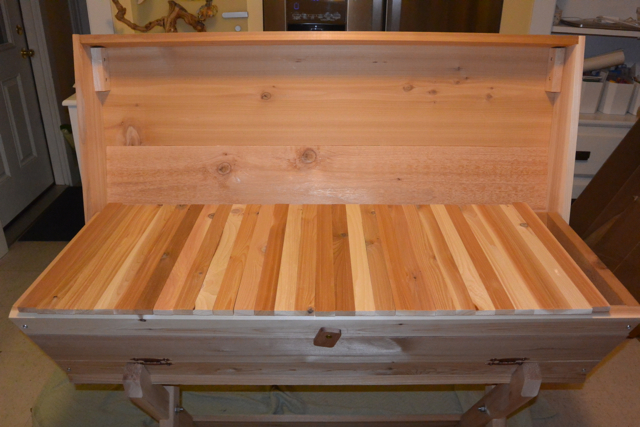
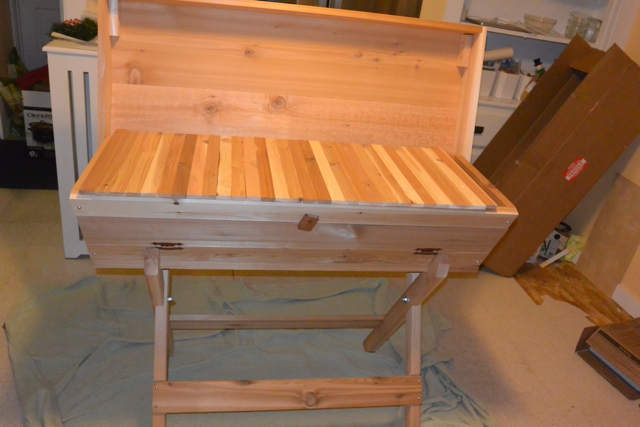
Now that the hive is built, I put all of the top bars and the two follower boards inside. Once again the hive sits in the kitchen waiting. The snow is melting quickly now, but there is still too much on the ground to set the hive up outside. The bees are scheduled to come in on April 20th, so I have about a month to make sure the hive is set up and ready before they get here.
I am very happy that I purchased the top bar hive through Bee Thinking. They have been wonderful with their customer service and their products. Even before I ordered my hive, I called them a few times to talk about top bar hives and get my questions answered. They were able to answer all of my questions and help me feel more confident in my decision to get in to top bar beekeeping. Check them out at www.beethinking.com.
Opening the box!All the pieces set out.The sides of the body.The bottom board added to the sides.The frame of the roof.Adding the top to the roof.The complete roof.A fully built top bar hive.The top bars have been added.The entire hive is complete!